#pebble stone craft ideas
Explore tagged Tumblr posts
Visit Tumblr Blog
Explore Tumblr blogs with no restrictions, modern design and the best experience.
Last Seen Tumblr Blogs


Fun Fact
Post activity is at the highest at 4:00 pm EDT; notes peak at 10:00 pm EDT.
Text
Unveiling Elegance: 15 Hidden Marvels of BUM BUM BHOLE 10Kg Multicolour Pebbles for Garden and Home Decor Bliss!
Learn About Water Beads
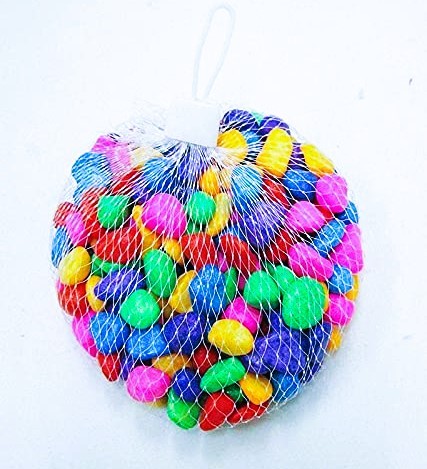
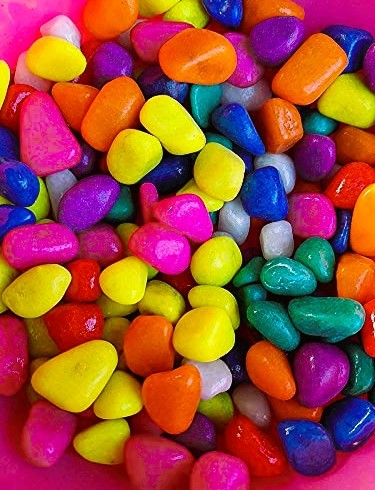
FAQs About BUM BUM BHOLE 10Kg Multicolour Pebbles
#Multicolour Pebbles#Garden Decor#Home Decor#Natural Radiance#Glow-in-the-Dark Accents#Zen Garden Ideas#Educational Play with Pebbles#Feng Shui Decor#Craft Projects with Pebbles#Eco-Friendly Weed Barrier#Temperature-Harmonizing Pebbles#Aroma Diffuser Stones#Plant Health Indicators#Subtle Soundscapes in Garden#Rainbow Pebble Assortment
0 notes
Text
Spoiling Astarion?
Bringing him back little things that remind you of him whenever he stays back at camp just so he knows you're still thinking of him while you're apart.
Astarion being so used to receiving little gifts from your travels that when you arrive back at camp, he's standing by your tent with his palm outstretched just waiting to see what you've brought him this time. The giddy little grin that's plastered on his face when you fork over the shiniest object you could get your paws on. All varying in degrees of monetary value, for sure, but all with a unique story of their own.
A couple of old coins from an ancient crypt. The entrance of which you'd all stumbled upon when Karlach punched a wall of a cave in victory after a particularly tough battle, only to come back with a handful of bones and cobwebs. The look of shock on her face when the entire wall came crumbling down on the group was enough to have you in stitches, entirely too weak from laughter to stand. You laid beneath the rubble for so long that Gale had assumed you developed a concussion and needed rescuing.
The PRETTIEST, crystal goblet that you'd stolen right from under a rich lady's nose under the guise that you were testing her drink for poison. You'd downed her ale in two gulps the second you exited the building. Was in the middle of patting yourself on the back for being oh-so cunning when you nearly fell on your ass. It was a sick, twisted coincidence that her ale did, in fact, turn out to be poisoned. But, at least you had a spare antidote on you that you gulped down before Shadowheart could find you in such a state. (And make fun of you, no doubt.)
A set of handmade jewelry– not stolen this time, if you can believe it. Wyll had pointed out the small shop to you while the two of you were out shopping for supplies. Said something about how it might be a good idea to pick out a new pair of socks since you'd been complaining about how holey yours had become after so much running around. Which was a good idea, truly– but the second you'd set eyes on the shop window, you knew what you wanted. A matching necklace and earring set, lovingly crafted with silver chain, so very delicate. So very understated that one could almost miss it among the rest of the more garish examples that sat alongside. Three, very small, opalescent stones shone so pretty at you beneath the sunlight that you could hardly look away. You would have given the shopkeep your left kidney just to see Astarion wearing them, but thankfully, it wasn't necessary. (You became so feral in your excitement to hear the very reasonable price that you nearly threw your entire gold pouch at the clerk's head and then kissed him on the mouth.)
You're an eager one. Astarion never has to wait– always receives his gifts before you can so much as slip your travel pack off of your shoulders. He goes real quiet for a moment. Has this far away look while gazing down at whatever it is, turning it over in his palm a couple of times to really study it.
The two of you sit together while you go through the rest of the day's spoils, and he listens while you tell him all about how you found today's special little trinket. Insists you spare no details in how you acquired it. (Unless any of those details are boring, dear. Do spare him of those.)
You know that there have to be some things he enjoys more than others. You know that there has to be some things you've given him that he outright dislikes. There have been a few occasions where he'd poked fun at you for bringing back something silly. Like "The roundest pebble you'd ever seen, Astarion, look at it roll!" or "This drawing of the two of you that you'd doodled on a stray sheet of parchment when you couldn't find anything else no matter how hard you tried!". BUT he has never refused anything you've chosen to bring back for him.
He thinks it's rather sweet that you've dedicated yourself to proving you still think of him when he stays behind. Wonders why you are the way that you are. Sort of loves you to death for it. Definitely does NOT invest in a bag of holding for everything once it all begins to stack up.
Definitely doesn't insist on you taking one half of the jewelry set so you always have a little piece of one another on you at all times. That would be ridiculous. (Earrings or necklace, darling?)
Sequel?
#bg3#astarion ancunin#baldurs gate 3#astarion#astarion x tav#astarion x reader#bg3 tav#astarion headcanons#gale dekarios#wyll ravengard#karlach cliffgate#shadowheart
2K notes
·
View notes
Text
Witches & Witchcraft: Types & Definitions
There is an abundance of types of witches, some being more common than others, for example, death witch or hedge witch. I have provided the different types of witches with a brief description/definition of what they study, believe and tools most commonly used for each.
The types of witchcraft is entirely up to the individual which they prefer to do. One person may only follow on type of magick whereas another may follow several. Listed are a handful of the many kinds, but I'm listing the most common/known types of magick/witchcraft that people fall into.
I have grouped some witches together as they fit together under the same or similar definitions.

Types of Witches
Religious witches;
Christian, Satanic (Theistic), Laveyan Satanic, Hellenic, Celtic and Wiccan, etc. are witches that follow a primary belief system and incorporate their religion into the craft.
Non-Religious witches;
Secular - doesn't work with [a] deity(ies).
Science - (also a craft type), uses metaphysical and scientific fads and theories mixed together.
Other types of witches;
Solitary - works alone and is not part of a coven. Won't typically work with other witches for spell work or any part of their practice.
Eclectic - a practice that includes multiple practises from different areas. A mixture of all practices, may practise one more than another, or all equally.
Hereditary/Generational - a witch who is born into a family whom practice the craft. The term 'Blood witch' is often a hot topic of controversy as to whether it makes one a more powerful witch.
Traditional - a type that is based on honouring the traditional ways of magick, which also ties in nicely with generational/hereditary witches.
Chaotic/Chaos - a witch who utilizes new, non-traditional and unorthodox methods. It's still relatively new and highly individualistic practice while still drawing from common forms of magick.

Types of Witchcraft/Magick
Green Witch; A witch who uses natural magick, such as creating blends of different plants, or primarily using herbs and/or crystals spells in their craft. Tools mostly consist of herbs, crystals, stones, flowers, soil or other greenery.
Hedge Witch; Also know as an astral witch, this type of magick is orientated around spiritual work such as astral projection, lucid dreaming, spirit work, healing and out-of-body magick. Tools mostly consist tarot cards, runes, pendulum, stones, crystal ball, mirrors & candles.
Dream Witch; Mindful and internal magickal practice mainly based from interpreting dreams and/or engaging in lucid dreaming. Practises used to 'de-code' symbols and messages in the dream world can be used similarly to how one would use divination techniques. Tools mostly consist of dream catchers, candles, books of glossaries of symbols.
Sea/Ocean; Derived from materials and abstract ideas involving ocean and the oceanic world. Sea or ocean magick can be worked with by using things found on or relating to a beach/lagoon. A sea witch might draw their energy from such tools. Tools commonly consist of driftwood, pebbles/stones, seashells, ocean water, bones, seaweed, candles.
Storm/Weather; magick used through combining one's energy with the weather; most commonly rain. Weather witches will collect different ingredients provided by the weather, absorb energy from storms, manipulate winnds, or perhaps predict the weather. Tools most commonly consist of rain/snow water, symbols/weather maps, crystals.
Cottage/Hearth; Magick that is weaved and worked or embedded into mundane tasks around the house or for loved ones. Cottage magick is usually worked into cleaning, hobbies or cooking. Tools commonly consist of essential oils, incense, bells, flowers, cleaning utensils, spices and herbs.
Tea Witch; Creating blends of teas for protection, remedies or even to use for tea-leaf divination. Tools commonly consist of tea, herbs, waters, spices.
Tech Witch; Use of technology in the craft, mostly based through phones or computers. Mostly used for storing of information, grimoires, spell books and Book of Shadows/diaries. Tools consist of apps on the phone, digital sigils, online blogs and pages.
Garden/Flora; Mostly (if not all) focused on herbal and botanical measures. Many garden witches have their own garden and plant flowers and herbs to draw in energy for their home and to include in rituals and spells. Tools commonly consist of flowers, soil, seeds, greenery, twigs/tree branches, leaves.
Elemental; Using all 4 (or 5) elements in an honouring or acknowledging form. A witch can choose to work with all, or singular elements. One may have a dedicated area on their alters to a particular elements. Tools consist of anything related to said element.
Faery/Fae; Magick for those who communicate with, and/or work with the Fae. Those whom work with fae may also leave offerings regularly as thanks for the assistance of a faery in their spell work. Tools commonly consist of anything sweet, sigils, offerings.
Spirit; A practice which an individual will perform spell work in conjunction with (or the help of) any manner of spirit, including Ouija, demon spirits, spiritual contact of any kind, working with ancestors. Tools commonly consist of crystals, bells, incense, Ouija boards, tarot cards, pendulums, sigils.
Draconian: The use of dragons and dragon imagery; whether it be trough astral matters or in spells and rituals. May also be connected with dragon spirits on their journey. Tools commonly consist of dragons art, statues, candles.
Seasonal; Utilizing and drawing energy from specific time periods of the year for their magick. One individual may feel more powerful at a particular time of year. It can also be spread out into the 4 seasons. Tools commonly consist of herbs related to certain seasons, stones, ruins and the weather.
Music; Can be through singing, humming, playing an instrument, creating music or having it on during spell work to add energies. Tools consist of speakers, instruments, voice, chimes, lyrics & sheet music.
Art & Craft; Anything from painting to knitting to building something. Tools consist of anything you can craft with.
Sigils; Working majorly with sigils and the intent that can be put into them to activate their power. Tools commonly used are pens, paper, makeup, candles.
Astronomy/Space/Luna; Correlates their belief in conjunction with the planets, stars and/or moon. Versed in moon phases and tend to do spell work at night rather than day time. Tools commonly used are horoscopes, calendars, charts, moonlight, moon water.
Energy; Those who prefer to do magick through energy exercises and manipulation rather than many physical tools or materials. This may also include aura work. The only tools needed for this type is yourself.
Crystal; Magick that is worked commonly with stones and crystals. The practise may include chakra balancing, crystal meditation and even spell work or rituals. Extensive knowledge of stone, including how to identify them. Tools most commonly used are crystals, books, grimoires and stones.
Literacy; Those who practise through books and literature - studying the craft after the 'beginner' phase of learning. Tools are books, poems, written work.
#witch#witchcraft#witchblr#pagan#wicca#witches#pagan witch#paganism#pagan wicca#witches of tumblr#baby witch#beginner witch#new witch#pagans of tumblr#witchcore#witch community#witch tips#witchy vibes#witch aesthetic#witchy woman#paganblr#hellenic pagan#celtic paganism#polytheism#grimoire#book of shadows#magick#folk magic#spell
301 notes
·
View notes
Note
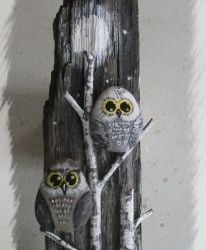
Where did you learn to do these amazing carvings? I see your work come across my dash every couple of months and every time I see it I think "I want to learn how to do this" so I figure if I know where to start looking I can make it one of my resolutions for 2025.
Thank you so much! I'm self-taught (my art education starts and finishes with art school sadly, my dream is to become a jeweller but I can't afford the education), and honestly, I'm doing this by intuition through trial and error. At some point I just realised that for some ideas I need something different, not paintings, and decided to try. I started working with small engraver on river shells, cleaning and polishing them to make pendants for miniature paintings, then at some point I started carving wooden landscapes for resin pendants and dioramas. So I'm mostly learning about materials through small experiments - a ribcage carved from a shell for an idea I'm still working on, arks made from small wood chips to test the waters, a new rotating tool for stones. I love looking at shapes and "finishing" them, so all my current stone carvings are made out of river pebbles, I don't have the equipment to cut bigger stones. Honestly, I'm useless at instructions because I don't know shit about serious crafts, but to get a small rotating tool and an object that gives you an idea about what it could become would be a good start.
40 notes
·
View notes
Text
Ten Questions for Writers
Thank you @sinderellanightwolf for the tag!
How many works do you have on AO3? 17
What's your total AO3 word count? 968, 068 (Scorched Earth makes up about a third of that number!)
What fandoms do you write for? Wrestling
Do you respond to comments? Why or why not? Pretty much always. I'll take any excuse to blab on about my fics and the thought processes behind them! Also, I appreciate anyone taking the time to write a comment and want to give a little something back.
Have you ever had a fic stolen? Don't know, never looked.
Have you ever co-written a fic before? Kinda. I consider Valets co-written as it's a request fic, so the readers had a lot of input and I've talked before about how big a contribution @my-intrests makes to the valetverse. Also Lonely Souls, was a request fic so I got given the bare bones of the story and added on the meat.
What's your all-time favourite ship? I'm more than just a tad feral about Punkintyre, but really it's Punklee, with Underpunk being a close second.
What are your writing strengths? Umm... I have no idea. I enjoy writing suffering? And drama? Not sure, if I'm good at them though... World-building, maybe? I enjoy crafting different AUs.
What are your writing weaknesses? Editing, proof-reading in particular.
First fandom you wrote for? Weirdly enough, it was wrestling, but the first time around when I was about 12 years old. I have an old notebook where I wrote stories about Stone Cold, the Rock... and a self-insert OC called the Pebble. Don't worry, there was nothing sexual but it's still pretty embarrassing!
I am tagging (but there is zero pressure!) @stripeydani @tache-noire @afterdarkprincess
10 notes
·
View notes
Photo
Creative Ideas for Painted Pebble and River Stone Crafts
#80#Creative#DIY#Home#Decor#Ideas#with#Pebbles#and#River#Rocks#That#Will#Find#a#Good#Use#for#Your#Sto
1 note
·
View note
Note
Lux, radiating his usual sunshine, swept in, arms laden with colorful bags. "I'm back from the tour! And I brought treasures!" he exclaimed, his voice echoing with genuine excitement.
First, came Adrian's gift: a bottle of shimmering, deep-blue liquor named 'Ocean's kiss' from the Azure Coast. Next, for Meri, Lux presented a delicate silver necklace from the Ember Mountains. The pendant was a tiny, intricately crafted phoenix, its wings inlaid with fiery opals that seemed to pulse with inner light. "Forged by the artisans of Ignis", Lux explained. "Their craft is considered legendary."
15 year old Cordelia, lounging on the sofa, received a fluffy, lavender-colored griffin plushie with impossibly large, sparkly emerald eyes. She chuckled, hugging it tightly. "He's so cute!"
Then came the rocks, each a miniature masterpiece of the earth. For Adrian Lux extended a jagged shard of obsidian, cool and impossibly dark. "It's from the Shadowlands. And for you, Meri, I have one from Crystal Coves", he gave a swirling piece of rainbow fluorite, radiating a gentle, calming energy. "And for Cordelia, something from a Sunstone Desert!" Lux chuckled and offered rock to her as well. It was a chunk of glittering pyrite, catching the light like a thousand tiny suns.
"Then there's these handmade and painted bookmarks!" Lux gave all of them their own. Adrian's depicted a majestic, fire breathing dragon, Meri's a serene unicorn gazing at the moon, Cordelia's a playful pixie dancing.
Lux then placed a bag filled with candies to the table; sweet sunburst drops from Floria, rich chocolate pebbles from Terrestria and tangy, spiraling lollipops from the kingdom of Aeria.
Finally, Lux presented a collection of spices from across Elementia. "Hopefully they spice things up and bring some variety", he smiled.
But the grand finale was a set of shimmering, golden tickets. "And these are exchangeable for tickets and VIP passes to any concert in Elementia", Lux declared. "I thought it would be fun for you guys to go as an family."
"Thanks, Lux. These are great gifts", Adrian smiled. Cordelia who was admiring her stone, nodded with enthusiasm and said: "Yes, thank you so much."
"Welcome back, Lux! We missed you and the guys!" Meri grinned as she hurried over to where Lux was. she was planning on hugging him but the bags he was carrying blocked her, so instead she stood by and waited to see what he brought.
"Oh my Luna! Lux, this is beautiful." Meri took her time to notice all the tiny details of the phoenix. Then she asked Adrian to help her put it on, handing the necklace to him while she held her hair out of the way.
She gasped as she took in the beautiful colors of the rainbow fluorite. Already she knew that she was going to display in on the nightstand by her side of the bed. A wonderful little beauty to fall asleep looking at it and to see when she woke up. After looking at her handsome husband of course. Even after all these years, she never got over the feeling of waking up and being happy to see him by her side.
The bookmark was lovely. She loved that all of her friends took the time to remember that the moon was an important part of her demon heritage. Also unicorns were her favorite fantasy creature so this bookmark would easily become her favorite and most used.
"You can only have one piece for now, Cordelia. Dinner is in the oven so I don't want you filling your stomach with sweets beforehand." Meri pointed at her daughter and playfully narrowed her eyes. Then she happily took the spices from Lux. "Oh, I can't wait to try some of these out."
She placed the tickets with the rest of their gifts. They would have to look at the dates and places and see which one would fit their schedule the best. It wouldn't be that hard and Meri loved the idea of seeing her friends perform.
Now that the gifts were all passed out, Meri finally got to hug Lux and welcome him back properly. As well as thank him for all the wonderful gifts. "You are truly too much. Thank you for all of these. They are amazing."
0 notes
Text
Transform Your Space with Stunning Exterior Pebble Tile and Pebble Stone Tiles
When it comes to elevating the aesthetic appeal and functionality of both indoor and outdoor spaces, nothing compares to the timeless beauty and versatility of pebble tiles. Whether you're designing a luxurious bathroom or creating a serene outdoor patio, incorporating pebble tiles can bring a natural, organic vibe that perfectly balances style and durability. This article explores the various applications of pebble tiles, emphasizing their benefits and inspiring ideas for your next project.
Embracing Nature’s Beauty with Exterior Pebble Tile
One of the most popular trends in modern landscaping and architecture is integrating natural elements into design. Exterior pebble tile is the perfect choice for those looking to create a seamless transition between indoor and outdoor living spaces. These tiles are crafted from natural stones, offering a rugged yet refined appearance that complements gardens, pool decks, walkways, and patios.
Using exterior pebble tile not only enhances the visual appeal but also provides excellent slip resistance, making outdoor areas safer and more functional. Their textured surface offers added traction, especially when wet, reducing the risk of slips and falls. Moreover, pebble tiles are highly durable, able to withstand harsh weather conditions, UV exposure, and heavy foot traffic. This longevity ensures that your outdoor space remains beautiful and functional for years to come.
In addition to their aesthetic and safety benefits, exterior pebble tiles are relatively easy to install and maintain. They can be set directly over prepared surfaces, and occasional cleaning with water and mild detergent keeps them looking pristine. For those seeking a natural, earthy ambiance, exterior pebble tile is an excellent choice to bring a touch of nature to any outdoor setting.
The Charm of Pebble Stone Tiles in Interior Design
Inside the home, pebble stone tiles are gaining popularity for their unique texture and organic appeal. They are particularly well-suited for feature walls, shower surrounds, and accent pieces. These tiles offer a tactile experience that adds depth and character to any interior space.
In kitchens and bathrooms, pebble stone tiles can be used to create stunning backsplashes or decorative borders that stand out. Their natural appearance complements various design styles, from rustic to modern minimalist. When used as floor tiles, they lend a distinctive look that breaks away from traditional ceramic or porcelain options.
The versatility of pebble stone tiles extends to their color palette. They come in a range of hues, from soft neutrals to vibrant earth tones, allowing homeowners and designers to customize their spaces according to their aesthetic preferences. Since these tiles are made from natural stones, each piece is unique, adding an element of individuality to every installation.
Pebble Tiles for Bathroom Floor: Combining Comfort and Style
Creating a luxurious bathroom involves choosing materials that are both stylish and practical. Pebble tiles for bathroom floors are an ideal solution for achieving a spa-like atmosphere. Their textured surface provides gentle massaging benefits underfoot, making daily routines more comfortable.
These tiles are also highly slip-resistant, which is crucial in wet environments. Whether installed in walk-in showers, around bathtubs, or across the entire bathroom floor, pebble tiles offer safety without compromising on design. Their permeable nature allows water to drain effectively, reducing the risk of standing water and mold growth.
Maintenance of pebble tiles for bathroom floor is straightforward. Regular sweeping or vacuuming followed by damp mopping keeps them clean. For deeper cleaning, mild detergents or stone-safe cleaners can be used. The natural look of pebble tiles adds a calming, earthy element to bathroom spaces, transforming functional areas into tranquil retreats.
Pebble Tiles for Floor: Durable, Attractive, and Easy to Maintain
When selecting flooring options, durability and aesthetics are often at odds. Pebble tiles for floor applications strike an impressive balance between these qualities. Suitable for both indoor and outdoor use, they are a practical yet stylish choice for kitchens, hallways, patios, and pool decks.
One of the key advantages of pebble tiles is their ability to adapt to uneven surfaces, providing a non-slip, textured finish that enhances safety. Their natural composition makes them resistant to cracking, chipping, and fading, ensuring they remain attractive over time. Additionally, they are resistant to stains and moisture, making them ideal for high-traffic or humid areas.
Installing pebble tiles for floor use can be a DIY-friendly project with the right preparation and tools, or it can be handled by professionals for a flawless finish. Once installed, their low-maintenance nature makes them a favorite among homeowners looking for a beautiful yet practical flooring solution.
Final Thoughts
Incorporating pebble tiles into your design projects can dramatically transform spaces, blending natural beauty with exceptional functionality. Whether you're considering exterior pebble tile for your garden pathways, pebble stone tiles for interior accent walls, or pebble tiles for bathroom floors, these versatile materials offer endless possibilities. Their durability, slip resistance, and unique aesthetic appeal make them an outstanding choice for creating inviting, stylish, and enduring environments.
For those seeking high-quality options, exploring collections that specialize in pebble tiles can provide a wide array of choices tailored to your specific needs. Remember, the right pebble tiles can turn any space into a serene, natural sanctuary that reflects your personal style and appreciation for nature’s artistry.
0 notes
Text
Naturally Lettered: Crafting with Nature & Typography
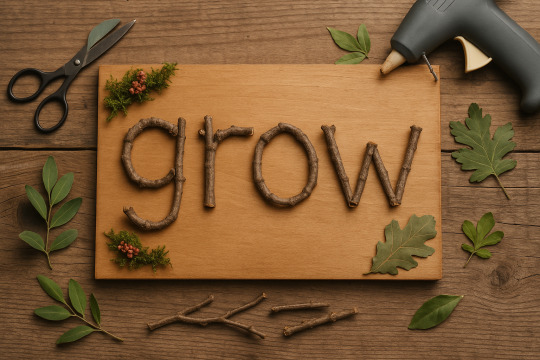
Ever looked at a tree branch and thought, “You could be an ‘S’”? No? Well, today’s your moment of enlightenment. We’re diving into nature-inspired crafting, where we mix organic materials like wood, leaves, stones, and flowers with beautiful text and creative font applications.
It’s earthy. It’s artsy. It smells like eucalyptus and ambition.
Why Nature + Typography = A Crafting Power Couple
Texture! Letters made of bark, moss, or leaves add rustic charm.
Eco-friendly. Less plastic, more fantastic.
Peaceful process. It’s hard to stress when you're gluing acorns onto a word plaque.
Typography contrast. Mixing crisp digital fonts with irregular organic elements? Chef’s kiss.
Your Supplies for This Wild Letter Adventure
Fallen branches or twigs (dry and clean)
Dried or fresh leaves (flat ones work best)
River rocks or small pebbles
Bark, acorns, flowers, moss, pinecones
Hot glue gun
Scissors, craft knife
Cardboard or wooden base
Paint pens or brush pens
Optional: Mod Podge or clear sealant
And yes, you guessed it—printouts of your favorite fonts or hand-drawn letter templates!
Project 1: Twig Typography Wall Hanging
Rustic. Reclaimed. Ready for Pinterest.
Steps:
Choose a short word like “Grow,” “Home,” or “Wild.”
Print it in a chunky sans-serif font (like Anton or Impact).
Use the printout as a template to cut and arrange twigs into each letter.
Hot glue twigs onto a sturdy cardboard or wooden base.
Add embellishments: moss accents, flower corners, or bark edges.
Pro tip: If twigs snap mid-project, just call it wabi-sabi typography—it’s all about embracing imperfection!
Project 2: Nature Rubbing Letter Art
A classic throwback with a typographic twist.
Steps:
Collect leaves with prominent veins, bark pieces, or textured rocks.
Place them under a piece of paper.
Lay letter stencils or hand-lettered outlines on top.
Use crayons or pastels to rub over the surface.
The texture of the natural elements shows through the letter shapes—voilà! Nature typography.
Fonts that work well: Stick to chunky, all-caps fonts so the textures really pop.
Project 3: Rock Quote Garden Display
Let your garden whisper sweet nothings to visitors.
How-To:
Gather smooth, flat stones.
Clean thoroughly.
Write or paint one letter per stone, spelling out a short quote or mantra.
Arrange the stones in a pot, along a path, or inside a shadow box frame.
Font vibes: Use script for elegance (Dancing Script) or uppercase for clarity (Futura Bold).
Typography Twist Ideas
Even when nature’s the star, you can still sneak in fonts creatively:
Leaf cutout banners: Cut letters out of real leaves and string them up.
Pressed flower monograms: Use pressed petals to "fill in" stenciled letters.
Clay letter stamps with wildflowers: Press natural elements into clay tiles alongside alphabet stamps for texture and text.
Crafting Mindset: Let Nature Guide You
Don’t worry about symmetry—organic shapes are part of the charm.
Mix natural chaos with font order—it’s balance, baby.
If a leaf tears or a twig crumbles, just compost it and keep going.
Keep font printouts nearby for tracing inspiration, especially if your handwriting looks like chicken tracks (no judgment).
Unique Fact of the Day:
The earliest known use of typographic “nature” was by monks who hand-lettered manuscripts using natural inks made from berries, bark, and soot. Calligraphy meets foraging—who knew?
https://letterhanna.com/naturally-lettered-crafting-with-nature-typography/
0 notes
Text
How to Create Beautiful Borders with Decorative Stones for Landscaping
Landscaping is an art that combines creativity, functionality, and nature, and when done right, it can transform an ordinary outdoor space into a stunning, cohesive environment. One of the most effective ways to enhance your garden, pathway, or backyard retreat is by incorporating decorative stones for landscaping. Not only do these stones add texture, color, and structure to your space, but they also serve practical purposes, such as defining borders, preventing weed growth, and improving drainage.
If you're looking to create visually appealing borders around your garden beds, paths, or other features, decorative landscape stone is an excellent choice. From Mexican stone to black beach pebbles, the options are endless, and each can be used to create a unique, stylish finish. In this blog, we’ll guide you through the process of using decorative landscaping stone to build beautiful borders that will elevate your outdoor space.
Why Use Decorative Stones for Landscaping?
Before we dive into the how-to details, let's first explore why decorative stones for landscaping are such a popular choice among landscapers and homeowners:
1. Aesthetic Appeal
The primary reason many people turn to landscape decorative stone is its ability to instantly improve the look of a space. Decorative stones for landscaping come in various colors, shapes, and sizes, which means you can easily match them to your overall design vision. Whether you're after a sleek, modern look with black beach pebbles or a rustic charm with Mexican stone, these stones allow you to tailor your landscape to your personal taste.
2. Durability
Unlike organic materials like mulch or grass, decorative landscaping stone lasts much longer. Stones won’t degrade or fade with time, which makes them a great long-term investment for your outdoor space. Whether it’s a border around your garden, a path, or a decorative feature, landscape decorative stone will remain intact for years to come, requiring little maintenance.
3. Low Maintenance
Once laid down, decorative landscape stone requires minimal upkeep. It won't need to be replaced annually like mulch, nor will it need constant watering or mowing like a lawn. This makes it a practical, low-maintenance solution that saves both time and money.
4. Functional Benefits
In addition to their beauty, decorative stones serve important functions. They can help with drainage, prevent soil erosion, and act as a natural weed barrier. Placing stones along paths, around trees, or in garden beds can keep the surrounding soil in place while improving the overall health of your garden.
Step-by-Step Guide to Creating Beautiful Borders with Decorative Stones
Creating beautiful borders with decorative stones for landscaping is easier than you might think. By following these steps, you can craft a stylish and durable boundary that will complement your landscape for years.
1. Plan Your Border Design
Before you start purchasing stones, it’s important to have a clear idea of what you want your borders to look like. Take the time to sketch out your design and decide where you want to place your landscape decorative stone. Borders can be used in various areas, including:
Garden beds: Defining the edges of flower or vegetable gardens.
Pathways and walkways: Lining paths to guide foot traffic through your landscape.
Trees and shrubs: Creating neat, well-defined circles or borders around the base of trees.
Patios or outdoor spaces: Adding an elegant border around your seating area.
Consider the shape of your borders—straight lines create a more formal look, while curves can provide a softer, more natural appearance. Your design should align with the overall style of your landscape, whether it's contemporary, rustic, or classic.
2. Choose Your Decorative Stones
The type of decorative landscaping stone you choose will significantly impact the look and feel of your border. Here are some popular options:
Mexican Stone: Mexican stone, also known as decomposed granite, is a popular option for creating natural, rustic borders. It comes in earthy colors such as golden brown, reddish-orange, and tan. This decorative landscape stone is perfect for creating relaxed, informal borders that blend seamlessly with plants and flowers.
Black Beach Pebbles: If you’re looking for a striking, modern look, black beach pebbles are a great choice. These smooth, glossy stones add a contemporary flair to any landscape design. The deep black color contrasts beautifully with lighter elements, making them a perfect addition for edging garden beds or outlining paths.
River Rocks: These stones are smooth and round, offering a more natural look. River rocks work well in both large and small borders, and their colors range from neutral grays to multicolors, allowing you to create an elegant border that complements your plants and surrounding features. River rock crystal glistens under the sun, its smooth, translucent surface reflecting the tranquil flow of the stream.
Cobblestones: If you prefer a more traditional, European-style border, cobblestones provide an attractive, sturdy option. They come in a variety of sizes and shapes, allowing you to create a more structured or ornate border around garden beds or pathways.
Crushed Stone: For a clean, modern look, crushed stone such as gravel, granite, or limestone can be used to create sharp, defined edges. The stones lock together, providing stability while giving the border a neat, tidy appearance.
3. Prepare the Area
Once you've selected your decorative stones for landscaping, it's time to prepare the area. Here's how you can get started:
Mark the borders: Use a garden hose, string, or even spray paint to outline where your border will go. This helps ensure your stones are placed in a straight or curved line, depending on your design.
Remove the grass and debris: Clear the area where you plan to install the stones by removing any grass, weeds, or debris. If you're working with garden beds, dig about 3-4 inches deep to allow the stones to sit comfortably.
Level the surface: After clearing the area, use a rake or shovel to level the surface. This will ensure that your stones are placed evenly and won't shift over time.
4. Add a Weed Barrier (Optional)
To prevent weeds from growing through your landscape decorative stone, it's a good idea to lay down a weed barrier fabric before placing the stones. The fabric is breathable and allows water to pass through while blocking weeds from sprouting up. Simply roll the fabric out over the prepared soil and cut it to fit the shape of your border.
5. Lay the Stones
Now comes the fun part—arranging the stones! Here’s how to do it:
Start at one end: Begin by placing your first row of stones at one end of the marked border. For straight borders, ensure the stones are aligned neatly. For curved borders, follow the natural curve, adjusting the stones as needed.
Fit the stones together: If you're working with larger stones, arrange them so that they fit snugly together. For smaller stones like black beach pebbles or crushed gravel, spread the stones evenly across the area.
Layering: For a more stable border, you may want to use a layer of larger stones at the base and then place smaller decorative stones on top. This will help keep the stones in place and add texture to the border.
Use edging tools if necessary: If you’re working with loose stones or gravel, consider using an edging tool or metal edging to keep the stones in place. This is particularly useful for more defined borders, like those surrounding a pathway or driveway.
6. Add the Finishing Touches
Once your stones are in place, step back and assess the border. Adjust the stones as needed to ensure a uniform look. If necessary, fill in any gaps with smaller pebbles or additional stones to create a seamless finish.
For extra flair, consider incorporating stone decoration around your borders. Small statues, garden gnomes, or decorative planters can help enhance the overall design and give your landscaping a more personal touch.
7. Maintain Your Stone Borders
The beauty of decorative landscape stone is that it requires very little maintenance. However, periodic checks are still important to ensure the stones haven’t shifted or settled. Over time, you may need to top up the stones, especially if they’ve been exposed to heavy rain or foot traffic.
Creative Ways to Incorporate Decorative Stones for Landscaping
Here are some creative ideas to inspire your stone border designs:
Combine different stones: Mix and match stones of different sizes and colors to create a more dynamic look. For example, you could combine Mexican stone with black beach pebbles to create a striking contrast around a flower bed.
Create multi-level borders: For sloped areas, use larger stones or cobblestones to create terraced borders that not only add visual interest but also help prevent soil erosion.
Use stone as ground cover: Instead of using mulch or soil, cover the entire garden bed with decorative stones. This can be particularly effective for xeriscaping (low-water landscaping) and for areas where you want to reduce maintenance.
Add lighting: For a dramatic effect, place solar lights along your stone borders. This will illuminate your landscape at night and highlight the beauty of your stonework.
Conclusion
Using decorative stones for landscaping to create beautiful borders is a simple yet impactful way to elevate your outdoor space. From natural Mexican stone to sleek black beach pebbles, the possibilities are endless when it comes to creating borders that are not only functional but also visually striking. With minimal maintenance and long-lasting durability, decorative stones are a wise investment for any landscape project.
0 notes
Text
Nature-Inspired Wall Decor Ideas for a Serene Home
Creating a serene and calming environment in your home starts with thoughtful design, and incorporating nature-inspired wall decor is an excellent way to achieve this. Nature has a unique way of bringing tranquility and balance, and with the right wall decorations, you can bring the outdoors into your living spaces. Here are some inspiring ideas to transform your walls into natural havens.
1. Botanical Prints and Artwork
Botanical prints are timeless pieces of wall decor that beautifully reflect nature’s elegance. Choose illustrations of plants, flowers, or herbs in soft, earthy tones for a subtle yet impactful touch. Arrange them in matching frames for a cohesive look, or mix frame styles for a more eclectic vibe. Large-scale botanical art pieces can serve as statement pieces for living rooms or bedrooms.
2. Vertical Gardens and Plant Walls
Bring greenery directly to your walls with vertical gardens or living plant walls. These installations not only add visual interest but also improve air quality and infuse your space with a sense of vitality. Options range from small, framed succulent arrangements to full-scale living walls featuring ferns, moss, and ivy. For a low-maintenance alternative, consider faux greenery that mimics the lush appearance of real plants.
3. Wooden Wall Art and Panels
Wood elements instantly create a warm and earthy ambiance. Consider wooden wall art featuring intricate carvings, laser-cut designs, or abstract patterns inspired by natural forms. Reclaimed wood panels can be used to craft a stunning accent wall, adding texture and depth while promoting sustainability. Choose light or natural wood finishes to maintain a calming aesthetic.
4. Landscape Photography and Paintings
Adorn your walls with breathtaking images of landscapes, forests, mountains, or oceans. High-quality prints of nature photography or serene landscape paintings can evoke feelings of wanderlust and peace. Opt for large-scale canvases or gallery-style arrangements to create a focal point that draws the eye.
5. Natural Fiber Wall Hangings
Macramé wall hangings, woven tapestries, and other fiber art pieces crafted from natural materials like cotton, jute, or wool bring texture and a cozy feel to your walls. Many designs feature patterns and colors inspired by nature, such as flowing rivers, cascading waterfalls, or desert landscapes.
6. Pressed Flower Art
Pressed flower art is a delicate and personalized way to incorporate nature into your home. Collect flowers and leaves from your garden or local surroundings, press them, and frame them in glass panels. This DIY project allows you to create unique pieces that resonate with your personal connection to nature.
7. Natural Stone or Pebble Art
Stone-inspired wall decor can add an earthy touch to your home. Consider pebble art, which arranges natural stones into shapes or patterns, or stone veneer panels for a textured accent wall. These elements can mimic the feeling of being in a tranquil outdoor retreat.
8. Seasonal Nature Displays
Create dynamic wall decor by incorporating seasonal elements. In spring, adorn your walls with pastel floral wreaths; in autumn, use dried leaves, branches, and harvest-themed decorations. Rotating decor keeps your space feeling fresh and in tune with the natural world.
Tips for Incorporating Nature-Inspired Decor
Color Palette: Stick to earthy tones like greens, browns, and neutrals to maintain harmony.
Lighting: Use natural light or soft, warm lighting to enhance the organic feel of your decor.
Sustainability: Opt for eco-friendly materials and locally sourced decor items whenever possible.
By integrating these nature-inspired wall decor ideas, you can create a serene and inviting atmosphere that reflects the beauty of the natural world. Whether you choose greenery, art, or textures, your walls can become a canvas for nature’s calming influence.
0 notes
Text
DIY Activities or Nature Inspired Crafts for Kids at AnandVan
Are your kids fond of DIY-activities? If yes, then you must have to visit - AnandVan Jungle Resort.
In today’s blog, we’ll see how kids can enjoy DIY activities and nature-inspired crafts at AnandVan. This place perfectly blends fun and creativity with the beauty of nature.
This premier family resort in Rishikesh is located in the middle of lush greenery and by the serene bank of the Ganges. This is a perfect place where kids can find their artistic side with nature inspired crafts.

Here are some delightful craft ideas that families can enjoy together during their stay at AnandVan.
Leaf Prints
Gather different leaves of different shapes and size around the resort. Let kids use non-toxic paint to color them. And press them onto paper, creating beautiful prints. This simple artistic activity teaches kids about beautiful creation and finding to explore local flora.
Nature Collage
Transform your nature walk into a creative session! Kids can collect flowers, twigs, feathers and pebbles during their exploration & bring them back to resort. With some glue and cardboard, they can craft lovely collages.
Rock Painting
One of the most popular activities at best riverside resort in Rishikesh is rock painting. Kids can choose smooth stone from the riverbank and turn them into colorful designs or characters. This craft encourages creativity in kids. Also, it leaves a piece of artistic expression.
Nature Weaving
Engage your little ones with nature weaving! Using grasses, leaves, and flowers, children can weave colorful materials into a simple loom from cardboard. This fun activity help kids develop their skills and allows them to connect with nature.
AnandVan Jungle Resort creates an inviting atmosphere for families to explore their creativity while enjoying nature. Their dedication to providing unforgettable experiences makes them one of the top resort in Rishikesh for families.
Come and join AnandVan for a memorable getaway filled with creativity & laughter!
0 notes
Text
Transforming Old Kitchenware into Eco-Friendly Decor
Table of Contents 1. Introduction 2. Why Upcycle? 3. Materials Needed 4. Creative Ideas 5. Tutorials 6. Inspiration Gallery 7. Conclusion 8. Ressources Introduction Upcycling is a fantastic way to breathe new life into old items, reducing waste and creating unique, eco-friendly decor. In this post, we'll explore creative ways to repurpose old kitchen items like jars, utensils, and cutting boards into stylish and functional decor pieces. Not only will you save money, but you'll also contribute to a more sustainable lifestyle. Why Upcycle Old Kitchen Items? Upcycling old kitchen items has numerous benefits: - Environmental Impact: Reduces waste and the demand for new resources. - Cost Savings: Repurposing items you already have is cheaper than buying new decor. - Unique Decor: Create one-of-a-kind pieces that reflect your personal style. Materials Needed Before you start, gather these common kitchen items and additional supplies: - Kitchen Items: Jars, utensils, cutting boards, baking tins, wine bottles. - Supplies: Paint, glue, hooks, sandpaper, chalkboard paint, twine. Creative Upcycling Ideas - Jars and Containers - Storage Solutions: Use jars to organize pantry items or craft supplies. Add labels for a neat look. - Decorative Vases: Paint or decorate jars to use as vases for fresh or dried flowers. - Candle Holders: Fill jars with sand or pebbles and place candles inside for a rustic touch. - Utensils - Wall Art: Arrange old utensils in a pattern and mount them on a wooden board for a unique wall piece. - Hooks and Hangers: Bend forks and spoons to create hooks for keys or towels. - Garden Markers: Use old spoons as markers for your garden plants. Paint the names of the plants on the spoon heads. - Cutting Boards - Chalkboard Signs: Paint one side of a cutting board with chalkboard paint to create a reusable sign. - Serving Trays: Sand and stain old cutting boards to use as serving trays. - Wall Decor: Decorate cutting boards with paint or stencils and hang them as wall art. Step-by-Step Tutorials Jars and Containers Storage Solutions - Clean the Jars: Ensure all jars are clean and dry. - Labeling: Use adhesive labels or chalkboard paint to label each jar. - Organize: Fill jars with pantry items like pasta, rice, or spices and arrange them on shelves. Decorative Vases - Paint the Jars: Apply a coat of paint to the outside of the jars. Let dry. - Decorate: Add ribbons, twine, or stickers for extra flair. - Fill with Flowers: Place fresh or dried flowers in the jars and display them around your home. Candle Holders - Fill the Jars: Add sand, pebbles, or decorative stones to the bottom of the jars. - Insert Candles: Place candles in the center of the jars. - Display: Arrange the candle holders on tables or shelves for a cozy ambiance. Utensils Wall Art - Arrange Utensils: Lay out old utensils in a pattern on a wooden board. - Attach: Use strong glue or small nails to secure the utensils to the board. - Mount: Hang the board on the wall as a unique piece of art. Hooks and Hangers - Bend Utensils: Use pliers to bend forks and spoons into hook shapes. - Attach to Wood: Screw or glue the bent utensils onto a wooden plank. - Mount: Hang the plank on the wall and use the hooks for keys, towels, or other items. Garden Markers - Clean Spoons: Ensure old spoons are clean and dry. - Paint Names: Use paint or permanent markers to write the names of plants on the spoon heads. - Place in Garden: Stick the spoons into the soil near the corresponding plants. Cutting Boards Chalkboard Signs - Sand the Board: Smooth the surface of the cutting board with sandpaper. - Apply Chalkboard Paint: Paint one side of the board with chalkboard paint. Let dry. - Use as Sign: Write messages or menus on the board with chalk. Serving Trays - Sand and Stain: Sand the cutting board and apply a wood stain of your choice. Let dry. - Add Handles: Attach handles to the sides of the board if desired. - Use for Serving: Use the board to serve food and drinks. Wall Decor - Decorate: Paint or stencil designs onto the cutting board. - Attach Hooks: Add hooks to the back for hanging. - Hang: Display the decorated board on your wall. Inspiration Gallery Check out these amazing upcycled kitchen items for more inspiration: - 50 Brilliant Repurposing Ideas⁶ - DIY Kitchen Makeover Ideas⁷ Conclusion Upcycling old kitchen items is a fun and rewarding way to create eco-friendly decor. Not only do you reduce waste, but you also get to enjoy unique, personalized pieces in your home. Give these projects a try and share your creations with us! Additional Resources - Eco-Friendly Home Decor Trends⁴ - Sustainable Living Blogs² Happy upcycling! 🌿 Read the full article
0 notes
Text
Elevate Your Home and Garden Decor with us.
*
Looking to add a touch of elegance and uniqueness to your living space or outdoor oasis?
We specialize in creating stunning stone statues, Buddha sculpture, abstract figure, modern art pieces, fountains, water features, planter, washbasin, garden lampion and a variety of other decorative items to enhance your surroundings.
Our talented artisans work with premium materials such as lavastone, sandstone, greenstone, petrified wood stone, marble, and pebble stone to craft exquisite pieces that are sure to captivate and inspire.
But what if you have a specific vision in mind? No problem! We also offer custom-made services to bring your ideas to life.
Just share your thoughts with us, and we'll work our magic to create a one-of-a-kind masterpiece tailored to your preferences.
And that's not all! In addition to our own creations, we can help you source and acquire other decor items like bamboo or iron products to complement your space.
From conceptualization to shipment, we've got you covered every step of the way.
Experience the artistry and expertise of Maju Karya Sentosa and transform your surroundings into a work of art.
Let us be your partner in creating a living space that reflects your unique style and personality.
For inquiry and further information please contact us :
🏛 @StoneConcreteTerrazzo
🌏 MKS-Jogja.com
📞 +628562873077
#GardenInspo #ArtisticCreations #CustomDesigns #ElegantLiving
instagram
#NaturalStoneIndonesia#HomeDecor#NaturalStoneProducts#CastStone#GlassReinforcedConcrete#Terrazzo#EpoxyResin#TeakRootErosion#GardenLandscaping#CarvedBuddhaStatues#ModernAbstractStatues#GardenFountains#WaterFeatures#WallArt#FlowerPots#Vases#Planters#sinks#SteppingStones#WashBasins#PebbleFlooring#StoneTiles#CustomDesigns#BuyingAgent#ProductSourcing#MajuKaryaSentosa#Instagram
0 notes
Text
Get Creative with Glass Bond Epoxy: Unleash Your Inner Artist and Transform Everyday Objects
The world of crafting can feel limited, especially when it comes to glass. But fear not, fellow creators! There's a secret weapon waiting to ignite your imagination: glass bond epoxy. It's not just a glue; it's a creative catalyst, unleashing a world of possibilities to transform everyday objects into stunning works of art epoxy for floors tiles
Beyond the Glue Gun: Why Traditional Methods Hold You Back
Traditional methods like glue guns might seem convenient, but they often hold you back from unleashing your full creative potential:
Limited Applications, Restricted Ideas: Traditional glues often lack the strength or versatility for complex projects. Your creative vision might be stifled by the limitations of these materials, restricting you to simple repairs or basic crafts.
Fragile Fixes, Fleeting Inspiration: Regular glues form weak bonds that deteriorate over time. This fear of impermanence can stifle your inspiration, making you hesitant to invest time and effort into projects that might not last.
Cloudy Vision, Obscured Beauty: Many glues leave behind a cloudy residue, detracting from the inherent beauty of the glass. This can leave your creations looking dull and unfinished, obscuring the artistic vision you poured into your work.
Introducing Glass Bond Epoxy: A Creative Revolution
Glass bond epoxy emerges as your creative revolution – a powerful tool that offers unmatched strength, versatility, and clarity:
Unbreakable Bonds, Limitless Creations: Epoxy forms a powerful chemical bond that rivals the strength of glass itself. This newfound security allows you to take on ambitious projects, incorporating heavier elements or intricate designs without fear of them falling apart. Dream big and build without limitations!
Crystal Clear Clarity, Unrestricted Vision: High-quality epoxy boasts remarkable clarity, mimicking the look of fused glass. This allows you to create seamless transitions and stunning effects, bringing your artistic vision to life without any frustrating cloudiness. Imagine creating breathtaking mosaics or crafting jewelry with flawless clarity, all thanks to the power of epoxy.
Material Matchmaker, A Universe of Possibilities: Unlike traditional glues, epoxy boasts exceptional versatility. It can effectively bond to a wide variety of materials including metal, ceramic, wood, plastic, and even stone. This opens doors for a universe of creative possibilities. Imagine incorporating natural elements like pebbles or driftwood into your glasswork, or creating mixed-media masterpieces that defy traditional boundaries.
From Ordinary to Extraordinary: A Guide to Unleashing Your Creativity with Epoxy
With glass bond epoxy in your arsenal, you can transform ordinary objects into extraordinary creations with these steps:
Safety First, Spark Your Inspiration: Always prioritize safety when working with glass and epoxy. Wear gloves and eye protection to avoid injuries. Ensure proper ventilation, especially when using certain epoxies that might emit fumes during curing.
Surface Prep for a Flawless Creation: A successful bond starts with a clean and dry surface. Thoroughly clean the areas you intend to bond with rubbing alcohol or a degreaser to remove any dirt, oil, or grease that might hinder adhesion.
Understanding the Cure Time, Plan Your Project: Different epoxies have varying cure times. Carefully read the manufacturer's instructions and plan your project accordingly to ensure optimal results. This allows you to pace yourself and create your masterpiece with perfect timing.
Unleashing Your Inner Artist: Techniques and Project Ideas
The Art of Application: The application technique depends on your project. For intricate details, consider using toothpicks or fine-tipped applicators. For larger areas, use squeegees or palette knives for a smooth, even spread.
Color My World: Explore the world of colored epoxies! Add vibrant hues to your creations or create stunning layered effects for a truly unique look.
Banishing Bubbles, Achieving Flawless Beauty: Use a heat gun (on a low setting and held at a safe distance) to gently move heat over the epoxy's surface. Rising air bubbles will burst, leaving a smooth and professional finish.
Clamping for Security: For some projects, using clamps can ensure a secure bond, especially when dealing with uneven surfaces or heavier elements. Choose clamps appropriate for the size and materials of your project.
Spark Your Creativity with Epoxy Project Ideas:
Mosaic Magic: Transform broken dishes, pebbles, or seashells into stunning mosaics for coasters, wall art, or even tabletops.
Jewelry Wonderland: Create one-of-a-kind pendants, earrings, or bracelets by incorporating glass pieces, metal findings, and epoxy.
Sculptural Delights: Experiment with sculpting techniques using glass and epoxy to create unique decorative pieces or functional art objects Epoxy tile joint filler
0 notes
Text
Luxury on a Budget:Achieve Your Dream Bathroom Goals in Port Macquarie

Imagine stepping into your own private spa, sunlight filtering through a skylight above, the scent of eucalyptus aromatherapy gently filling the air. This blissful escape doesn't require a five-star hotel; it's your newly renovated bathroom, a luxurious oasis right in your Port Macquarie home.
But don't let "luxury" intimidate you. It's not just about extravagant materials; it's about creating a space that reflects your unique style and pampers your senses. Forget cookie-cutter designs - this is about your sanctuary.
Start by dreaming:
What's your vibe? A calming Zen retreat with natural elements, or a glamorous Hollywood-inspired haven with bold colors and textures?
What can't you live without? Imagine yourself indulging in a deep soaking tub, a spacious walk-in shower with multiple jets, or heated floors for those chilly mornings.
What materials speak to you? Do you envision the cool elegance of natural stone, the sleekness of modern porcelain, or the warmth of sustainable wood?
Now, let's make it real:
Tap into local expertise: Port Macquarie boasts a vibrant community of talented designers, builders, and suppliers who specialize in luxury renovations. Ask around, check online reviews, and find someone who understands your vision and the local resources available.
Be budget-savvy: Luxury doesn't mean breaking the bank. Set a realistic budget and allocate funds wisely. Prioritize your dream features while leaving room for flexibility and unexpected finds. Remember, quality materials and skilled craftsmanship are key to a bathroom that lasts.
Embrace space and light: Port Macquarie homes often have the advantage of beautiful natural light. Make the most of it with large windows, skylights, or well-placed lighting. Don't forget clever design tricks to maximize space, like floating vanities or corner showers.
But luxury goes beyond the visual:

Indulge your senses: Imagine dimming the lights for a relaxing ambiance, setting the mood with your favorite spa music, or stepping onto toasty heated floors. Consider aromatherapy diffusers, soothing soundscapes, and even a rainfall showerhead for that ultimate spa experience.
Embrace the local touch: Port Macquarie offers unique opportunities to personalize your space:
Imagine natural stone tiles sourced from regional quarries, adding a touch of coastal authenticity.
Picture custom-made timber vanities or shelves crafted by local artisans, bringing warmth and craftsmanship to your bathroom.
Envision locally-made artwork or textiles reflecting the coastal vibe, tying your sanctuary to its surroundings.
Here are some inspirational ideas to get you started:
The Coastal Spa: Think calming blues, greens, and sandy beiges, pebble tile accents, a freestanding tub overlooking a garden, and woven baskets adding a relaxed touch.
The Modern Oasis: Picture sleek lines, bold colors or patterns on large-format tiles, a walk-in shower with a rainfall head and jets, and smart technology features for ultimate control.
The Family Sanctuary: Imagine double vanities for shared routines, a walk-in shower with a built-in bench for little ones, durable materials for busy mornings, and smart storage solutions to keep things organized.
Remember, your dream bathroom is all about you. Don't be afraid to explore local showrooms, browse online inspiration, and create a mood board to visualize your haven. With careful planning and the expertise of Port Macquarie's professionals, you can transform your bathroom into a luxurious escape that nourishes your mind, body, and soul.
Bonus Tip: Don't wait! Start the journey to your dream bathroom today. Remember, it's not just about the final result; it's about the process of creating something special for yourself. Enjoy the journey! contact us.
0 notes